Most people who buy a walking pad set it up wrong, and it is almost never the machine's fault. The box arrives, the pad gets dropped in the corner of a small apartment, the deck sits directly on hardwood, and every bit of vibration from the motor goes straight into the floor. Within a week the neighbor downstairs is texting about a hum they can feel in their ceiling, and the machine has started sliding forward an inch every session. A walking pad treadmill setup done properly takes about twenty minutes and prevents all of that before it starts.
I have set up more of these than I can count in a 680-square-foot apartment in Austin, because I coach runners for a living and half the year the weather here is either too hot or too cold to do the work outside. This is the order I do it in, the two pieces of gear that make it work, and the mistakes I see in almost every apartment setup.
Why you should trust me
Twelve years of coaching running and 40,000 logged miles of my own, almost all of it outdoors, until my knees started filing complaints and my clients kept asking the same question: what do I buy for an apartment? I did not have an answer I trusted, so I bought a cheap foldable treadmill for my own living room and started testing the way I coach. One rep at a time, written down, no shortcuts. I have since unboxed, folded, wheeled, and run on more than 30 machines in that same small apartment.
I know which folding latches bite your knuckles, which incline systems feel like plastic blocks wobbling under the deck, and which motors you can hear through a wall at walking speed. I also have a rule that came from a runner I coached who bought a cheap treadmill on my half-hearted suggestion, hated it, and quit training indoors entirely. I do not recommend a machine I have not lived with for at least two weeks in a real living room.
How I picked and how I tested
Everything below gets judged on five things, in this order.
First, deck length. If my full stride does not fit on the belt, nothing else on the machine matters, because I will end up taking smaller than normal steps and wrecking my own form. Second, noise at walking speed. I test that during an actual conference call, not during a workout, because a call is when a loud motor becomes a real problem. Third, folding and moving. I fold the machine and wheel it out of the way at least ten times before I call it storable, since a fold that only works once is not a fold. Fourth, the incline system. If the deck tilts on risers that wobble, the machine is cutting corners somewhere else too. Fifth, the floor. Every machine I test sits on a wood floor above someone else's ceiling, so vibration control is not an accessory here. It is part of the setup.
I also ran a belt wear check on the budget pick in my rotation through 200 miles before I would say anything positive about it in print.
What you need before step one
Two pieces of gear. The machine, and the layer between the machine and your floor. Skip the second one and you will be re-leveling the first one every week.
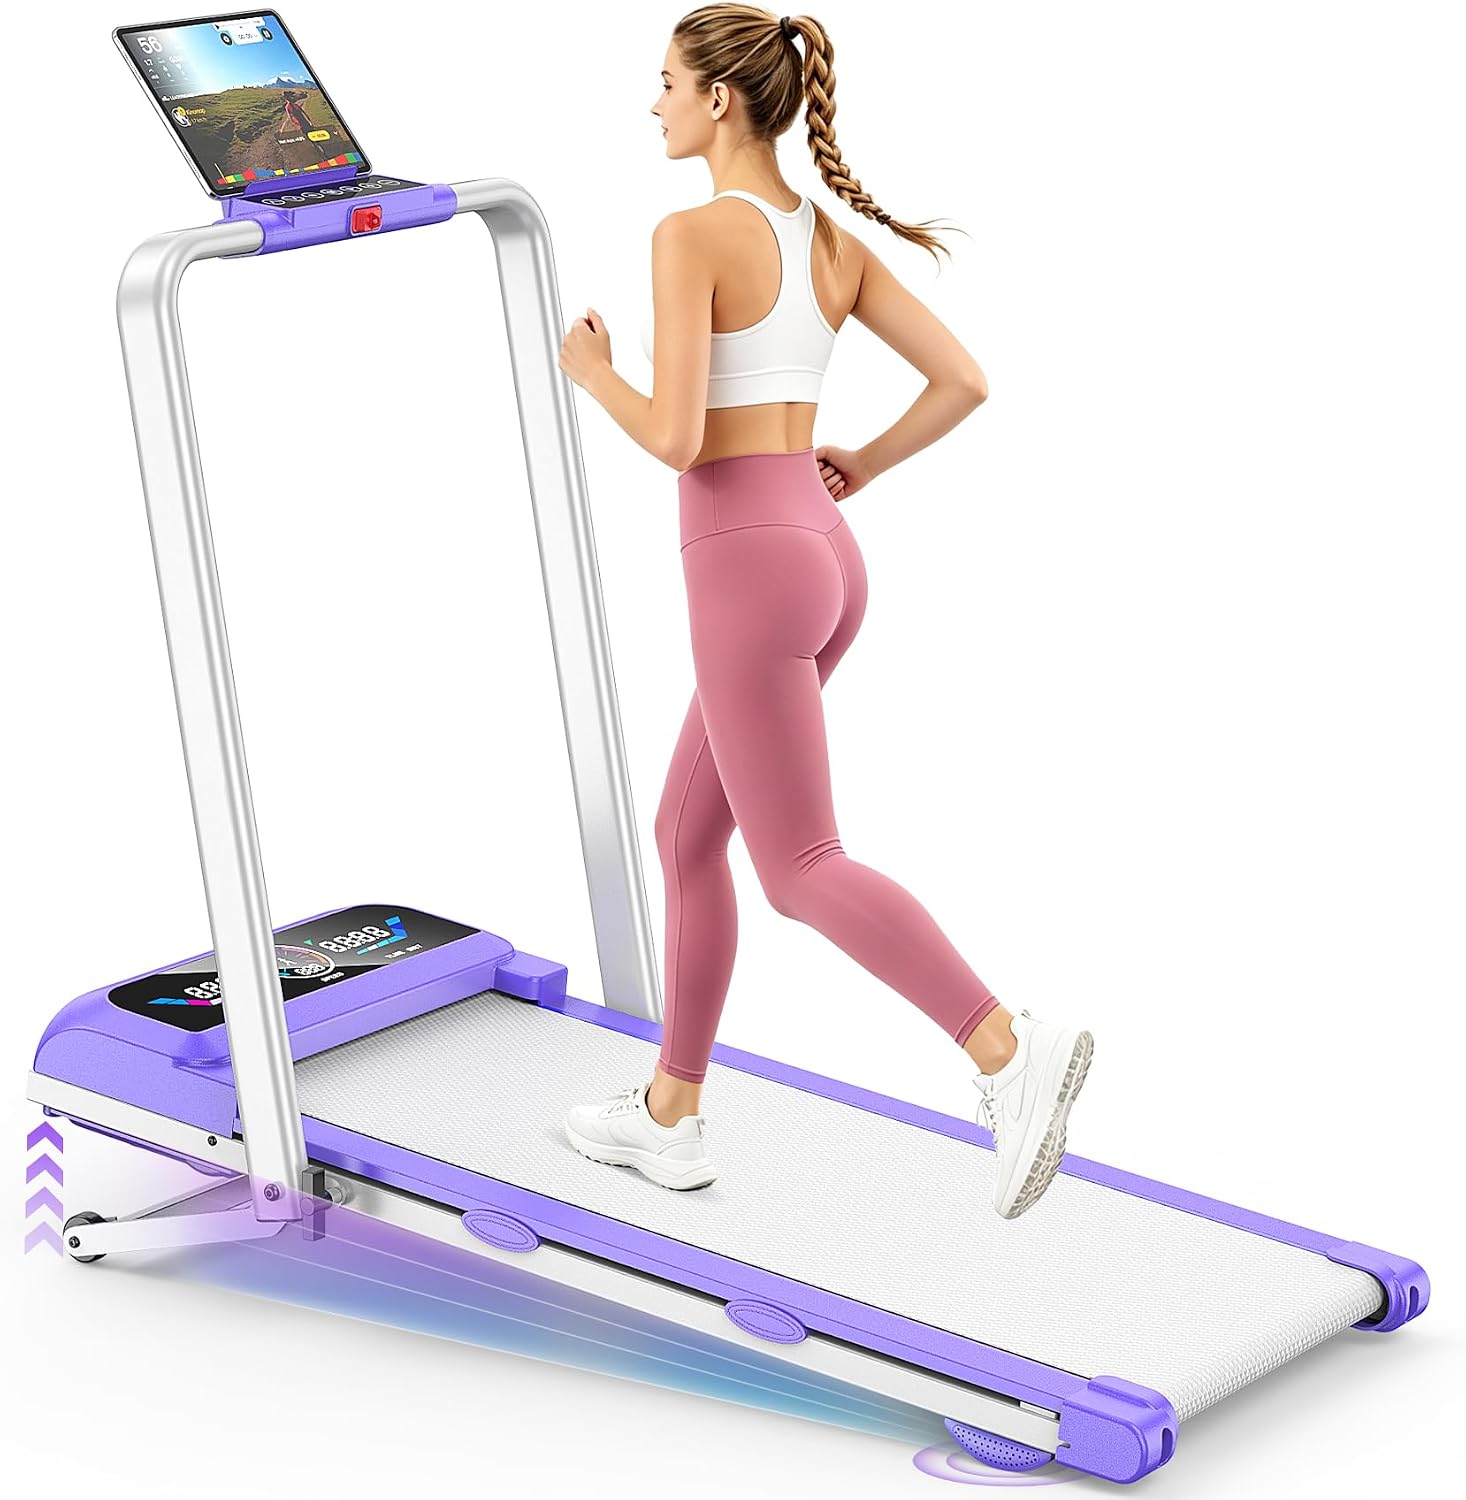
The machine: Walking Pad Treadmill with Auto Incline & Handle Bar, 4 in 1 Foldable Under Desk Treadmill, 3.5HP Portable Walking Pad for Home Office, 350LBS Capacity, LED Display, Remote Control
 Visit on Amazon →
This is the machine I would start with if you work from a small apartment and want one frame that does both jobs. It folds, which is the whole point in a space this size, and it has a handle bar, which matters more than people expect for the first few sessions when your balance on a moving belt is still new. The auto incline is the spec I care about most, because it means the deck tilts under its own power instead of resting on plastic blocks you prop underneath. Those blocks are the tell on a budget machine. When they wobble, the rest of the build usually wobbles with them.
The 4 in 1 framing covers flat walking, incline work, and the handle-bar configuration, so you are not buying three machines for a desk setup, a walking session, and a harder climb. The remote and LED display are conveniences, and the 350 pound capacity means it will hold up for most adults without the frame flexing under a heavier stride. Check current Amazon price before you commit, and check the folded dimensions against the gap you actually have, not the gap you wish you had.
Flaws but not dealbreakers: Nothing with a motor and a folding hinge is silent, and I am not going to call any motor quiet in print without a reading to back it up. Test yours at walking speed during a call. If you can hear it through the wall, move the machine before you blame the motor. Also budget a few minutes for the first fold. New hinges are stiff.
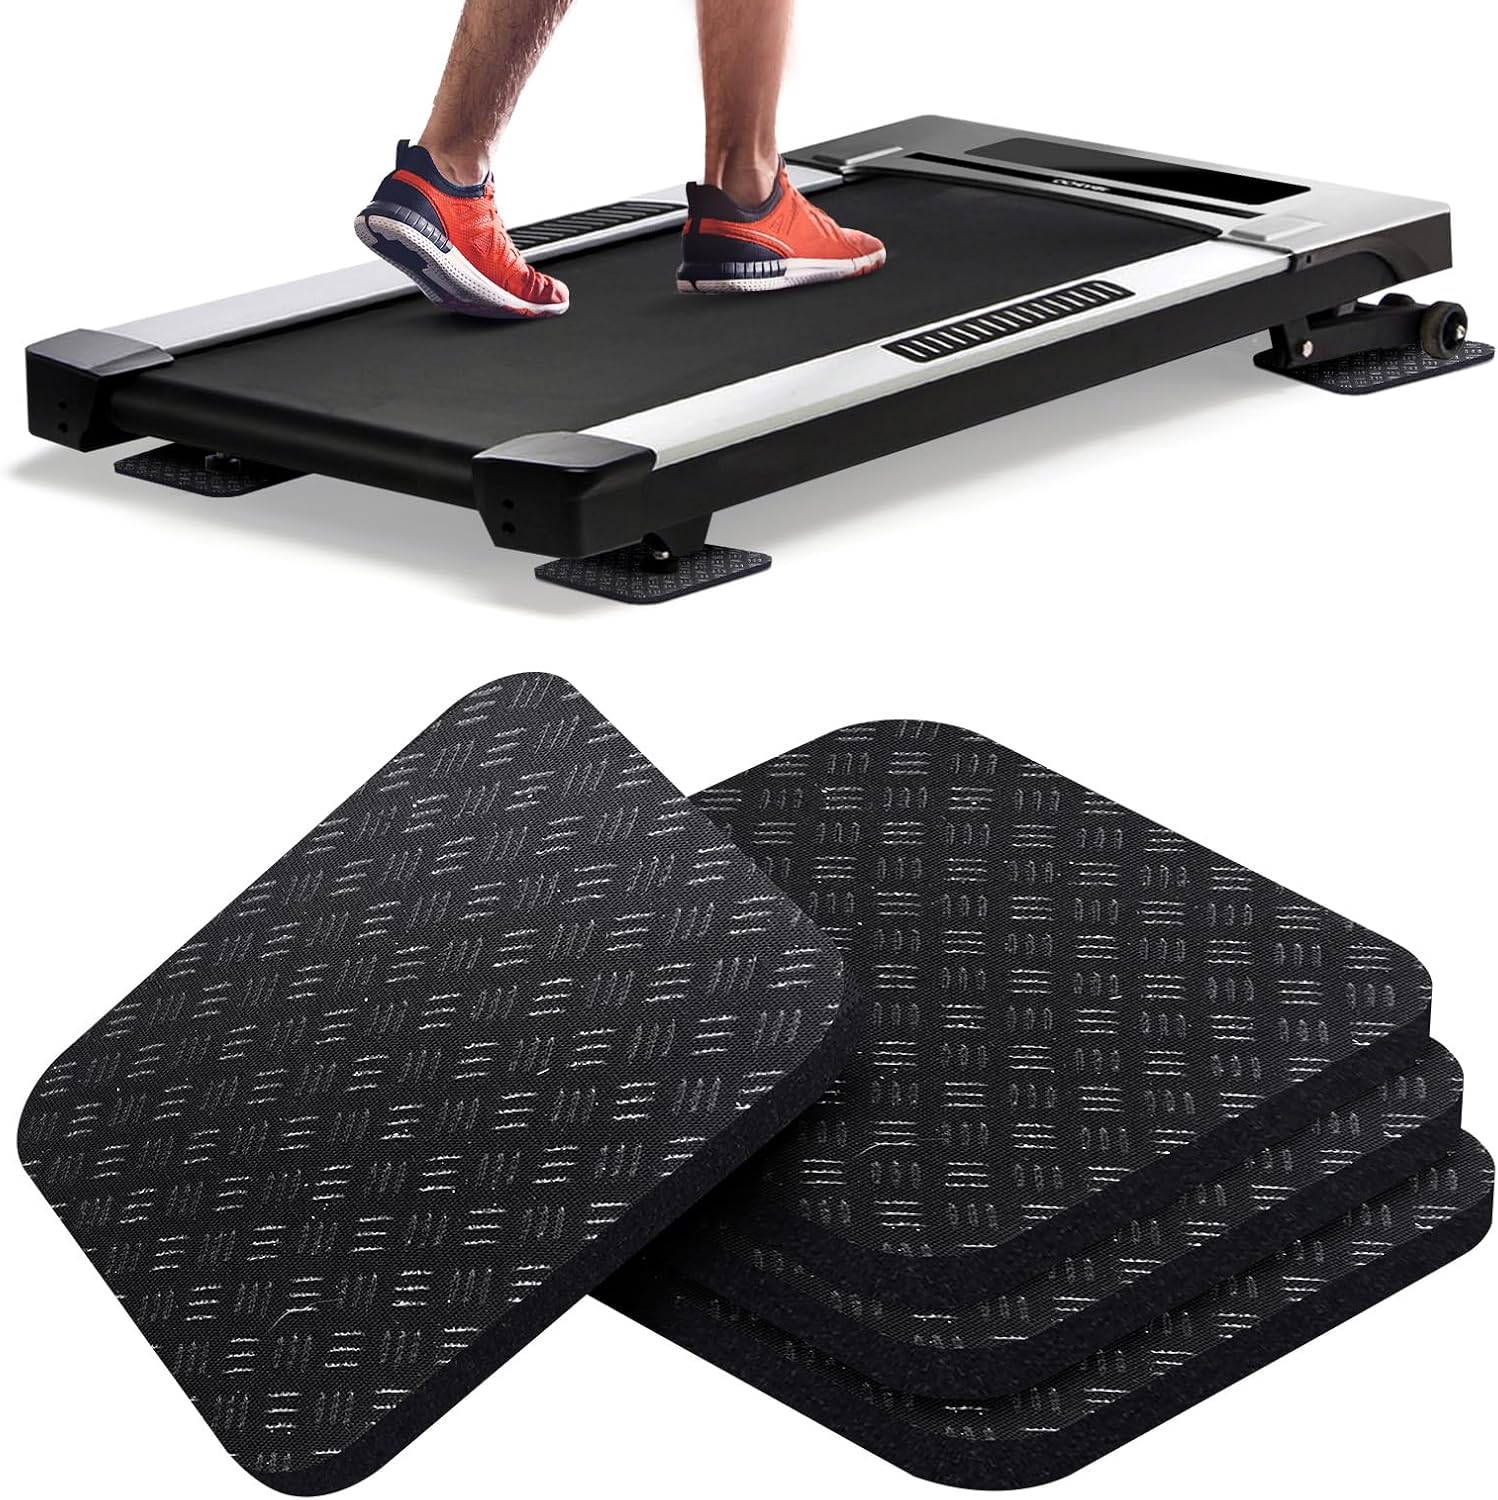
The floor layer: Treadmill Mat Pads 4PCS- Double-Sided Non-Slip - Anti Vibration Mat for Treadmill, Walking Pad, Exercise Bike - Hardwood Floors Protection
 Visit on Amazon →
Four pads, double sided, non-slip on both faces, and this is the piece almost everyone skips. A walking pad rests on four contact points, so four pads are the correct shape for the job. A full-length mat under a folding machine is worse than useless, because it gets pinched in the hinge and bunches up when you move the deck.
The anti-vibration job is the important one. These pads break the path between the motor and the floor joists, which is the difference between a machine your downstairs neighbor never notices and one they hear at 7 a.m. The non-slip faces do the second job, keeping the deck from creeping forward during a long session, and the hardwood protection is the bonus. Felt feet on a moving treadmill will leave marks. Check current Amazon price, because this is the cheapest part of the setup and the one that protects everything else in it.
Flaws but not dealbreakers: Thin pads compress over time, so if your floor is uneven you may need to re-seat them or add a shim under one corner. If the deck still rocks after the pads are down, the floor is the problem, not the pads.
The actual setup, step by step
This is the order that works. It is the same order I use in my own living room and in every apartment I have helped set up.
Step one: pick the spot before you unbox. You need an outlet within reach of the cord without an extension cord running across a walking path, no door swing that hits the deck, and a couple of feet of clear space behind the belt so you can step off without thinking about it. If you live above someone, avoid placing the machine directly over their bedroom. Vibration travels down and sideways, and the middle of your living room is usually a better spot than the wall you share.
Step two: check your stride against the deck. Stand on the belt and take several full steps. If your feet stay on the belt at a normal stride, you are fine for walking and incline work. If you have to shorten up, the machine is a walking machine for you, not a running machine, and no amount of incline will change that. Deck length is the first spec I check on anything, and it is the one you cannot fix later.
Step three: put the pads down before the machine. Not after. Position one under each of the four feet, not in the middle of the frame. Lift the machine onto them rather than sliding it, because sliding the feet across the pads drags them out of position. Once it is down, push the deck side to side. It should sit flat with no rock. If it rocks, fix it now, because a rocking deck gets worse at speed.
Step four: unfold, lock, and move it ten times. Before you decide the machine is easy to store, fold it and wheel it out of the way ten times. This is the test that separates a machine you will actually use from one that becomes a coat rack. Check the wheels on your real floor surface, not carpet, and check that you can lift the folded frame on your own.
Step five: clip the safety lanyard and test it. The magnetic safety lanyard is the clip that kills the belt if you fall. Clip it on, start the belt at the slowest speed, and pull the clip. The belt should stop. This is the one safety feature I check on every machine, and it is the one people forget after setup day.
Step six: break the belt in slowly. Your first few sessions should be at walking speed with no incline. You are checking two things: whether the belt tracks straight without drifting to one side, and whether the deck feels stable under your normal walking pace. This is also when you check the lubrication situation. If the belt feels dry or the machine ships with a tube of lubricant, follow the maker's instructions before you log real distance on it.
Step seven: do the conference call test. Start the belt at walking speed during an actual call and listen. Not from the machine, from the next room and from the room below if you can get there. If you can hear the motor through the wall, move the machine to a different spot before you spend a month telling yourself it is fine.
Step eight: set the incline after the deck is level. Incline work is where a machine's build shows. Add incline only once the deck is sitting flat and stable, and check that the deck does not rock or shift as it tilts. If the incline mechanism shudders or feels loose, back it off and check that nothing is caught under the frame.
Step nine: deal with the cord. Tape it down or route it along a wall so you never step over it mid-session. A loose cord under a moving belt is the most common avoidable problem I see in apartment setups.
Step ten: check it weekly. Belt tension and centering, lubricant, and whether the pads have migrated out from under the feet. That is a two-minute job and it is the reason a budget machine can last years instead of months.
Where a walking pad should not go
A few placements that do not work, no matter how good the machine is.
Thick pile carpet is the big one. The feet sink, the deck rocks, and the pads do nothing because they are buried. Low pile or a hard surface is what these machines are built for. A bedroom directly above a sleeping neighbor is the second. Even a well-damped machine makes some noise, and a 6 a.m. walking session is a bad way to meet the people downstairs. Third, do not buy a walking pad to run on. A walking pad is a walking pad. If you want to actually run, you need a deck that fits your stride, and most pads do not have one. Fourth, if you are tall, check the handle bar height against your ceiling and your desk before you set anything up.
The competition and why it lost
Full-size gym treadmills are wonderful tools that belong in gyms. In a small living room they are a very expensive place to hang laundry, and most people shopping in this category do not need one. Full-size folding treadmills sit in the middle. They are the right answer for a dedicated runner with a spare room, and the wrong answer for a desk setup in 680 square feet.
Plastic incline blocks lost for a different reason. They work, technically, but they wobble slightly under the deck and they tell you something about where the rest of the machine's corners were cut. A motorized incline is not a luxury feature in a small apartment. It is the difference between a machine you adjust and a machine you leave alone because adjusting it is annoying.
A full-length floor mat also lost to the four-pad setup, and this one surprises people. Under a folding machine, a full mat bunches in the hinge and traps grit. Four pads under four feet do the job with less material and less to trip over.
What this all costs
The floor layer is the cheapest part of this setup and the one that protects everything else, so buy it first. The machine is the real spend, and the honest way to think about it is cost per day over the life of the machine. Whatever you pay, divide it by the number of days you will actually use it. A machine used four days a week for two years comes out to a number that looks a lot smaller than the sticker, and a machine that slides around and rattles the floor below gets used about three times before it becomes furniture.
The setup itself is free. Twenty minutes, four pads, one careful look at where the deck is going to live. Do it in that order and the machine disappears into your routine instead of into your neighbor's ceiling.